- Exterior finish options
- Plumbing and communications
- Design details
To make a bathroom renovation, you need patience, accuracy, a thorough approach to business and some repair skills. But if you want to do it yourself, you need to be well prepared. This way you can save a lot on labor costs. True, in order to get a high-quality budget one with your own hands, you have a considerable preparatory front, because on this relatively small area you will find a whole range of various works: from plumbing and sewerage to the electrical part.
When choosing materials for a budget bathroom renovation, it is important not only to select the cheapest ones, but also pay attention to quality.
It is also worth being prepared that repairs in the bathroom will be tested for strength by constant fluctuations in humidity and temperature. When arranging this room, you will find a difficult choice of high-quality plumbing and finishing materials. Therefore, it is simply necessary to be as rational and organized as possible when doing repairs in the bathroom in order to follow the correct sequence of work. This will lead you to the desired result with the least loss and cost.
Inexpensive repair
You need to understand that the wording “inexpensive or budget repair option” should not at all affect its quality. To begin with, you should consider what exactly you can really save on. Performing a significant part of the work on, you do not have to spend a significant amount on workers. You can do a lot without even having a special construction qualification.
Another point to save can be materials. Here you need to be careful not to have to pay twice, getting rid of the consequences of inexpensive repairs. You can cut costs only on additional things, rough or auxiliary materials.

Try to adequately assess your strengths and knowledge before you take on the rooms with your own hands, so as not to get into even greater expenses. Spoiling expensive plumbing with inept installation or flooding neighbors due to improperly made communications and draining is hardly your plan.
To avoid these and any other troubles, draw up a plan for the proposed bathroom renovation work. It is worth considering the design and deriving at least a rough estimate. So you can see what you can do yourself, and where you need to turn to professionals.
Back to index
Preparatory work
When drawing up a plan, you should try to take into account and think through any unforeseen situations and options for how they can be eliminated. So you will not waste time due to lack of tools or lack of materials. Here are some nuances to take into account:
- when buying a tile, keep in mind that it can break or become waste, so purchase with a margin of 3-5%;
- for other materials (silicone, sand, cement and others), take an additional margin of 30-40%.
Back to index
Walkthrough
The first thing to do is to prepare the room for repair work. Carefully unplug all plumbing, even if you don't plan to change it. Now you need to dismantle the old coatings. After you remove the tile, wallpaper or paint, clean off the previous layer of putty. Then you have to remove the old cement screed on the floor and the remnants of waterproofing. When these works are completed, thoroughly clean the bathroom of debris, dust and other debris.
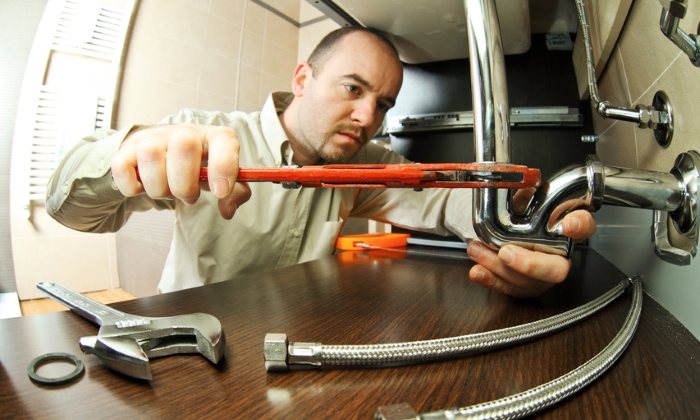
The first step when renovating a bathroom is to disconnect all plumbing.
To level the cleaned surfaces, you will need a cement mortar, and the resulting gaps can be sealed with a sealant. This is necessary because due to condensation, constant high humidity and splashing, any repair work can very soon come to naught. For the bathroom floor, you can use coating waterproofing - it is applied to a concrete screed (on top in two layers, although it is possible in one).
Back to index
Exterior finish options
As a savings option, you can choose to tile only one surface. The optimal solution is the floor, since it is on it that the main load falls due to the aggressive wet environment. Even budget repairs do not justify linoleum for the bathroom floor. Due to the frequent ingress of water, you run the risk of acquiring fungus and mold, so this coating can only serve as a temporary option.
You can save on tiling by doing it yourself. You just need to get ready:
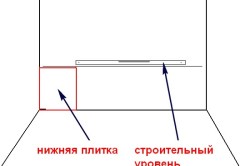
- Mark the wall using a scale bar.
- Apply tile adhesive to the prepared base with a special notched grater.
- Lay the tile on top, pressing firmly. You can make the same distance between the tiles using special plastic dividing crosses. Remove adhesive residue from the tile surface after installation. It is worth using the building level so that there are no irregularities.
- When the glue dries, grout the seams.
Rooms can be saved by using ordinary PVC plastic panels for wall decoration, since this material is not only inexpensive, but also environmentally friendly, durable and easy to maintain.
In addition, this finish has a variety of colors, in the assortment of which you can definitely find something suitable for yourself. Using this material, you can easily finish the walls of the bathroom with your own hands. What will need to be done:

- When installing the crate, you can not do without plastic profiles and wooden bars. Pre-mark the walls and fix the slats so that they run parallel, having the same distance from each other.
- Now you can install components, that is, corners and moldings. They will be needed to mask the joints and corners when you make the cladding.
- Start installing wall panels from the corner farthest from the entrance. Insert the panels into the moldings from the side and fasten them one by one. Each product must be pressed tightly so that there are no gaps.
- If you need to install a switch or socket, just cut a hole in the panel.
- The last panel may be too large and will need to be trimmed.
- Try to ensure maximum tightness by applying sealant to the edges of the panel before inserting.
As for a budget bathroom ceiling solution, consider whether you can tackle tensile structures, which are an expensive option in and of themselves. Therefore, even a not very flat surface can simply be removed from the old coating, puttyed, primed, and then painted with acrylic paint to match the bathroom. Plastic panels will be the way out if the defects can no longer be hidden by such processing.