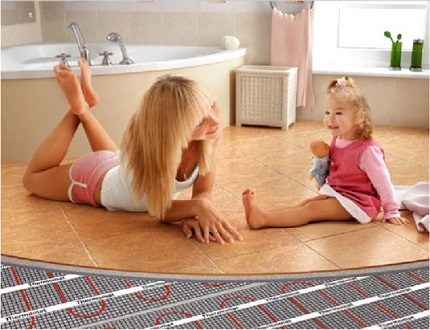
The bathroom is usually visited in the morning or in the evening - during periods when people are most relaxed and in the mood for a pleasant stay. If the room is cool or damp, it causes discomfort, negative emotions. Sometimes high humidity and cold tiles on the floor even cause colds. Underfloor heating in the bathroom is the ideal solution to this problem.
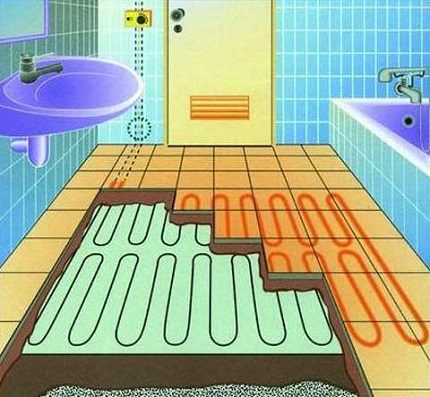
Floor heating will not hurt in any room, but it is in the bathroom that you really need it. Most often, ceramic tiles are laid on the floor. If it is not heated from below, it is almost always very cold. Even the rug in front of the bathroom does not help. The heating system warms up tiles, air, wall and ceiling finishing materials.
Distinguish between water and electrical systems. In the former, heating is carried out using a pipeline laid under the floor covering. The coolant circulates in the pipes. In electrical systems, heating works by heating elements: cables, films, mats, rods.
All designs have their own advantages and disadvantages, differ in price, installation complexity. So, in the bathroom in the apartment it is better to install an electric underfloor heating, and for a private house you can choose any type of system.
The underfloor heating system helps to solve one of the most important problems - dampness in the bathroom, which leads to the growth of pathogenic fungi and mold. These microorganisms can cause some serious illnesses such as asthma.
Option # 1 - water heating
A water-heated floor is more suitable for a private house than for an apartment in a high-rise building. This is due to the fact that underfloor heating is usually connected to a central heating system, which is quite difficult to implement in an apartment. Another nuance: in the event of a serious pipe rupture, the neighbors from below can be flooded. All these problems do not exist in a private house.
The heating system consists of a heating agent mixing unit and pipes laid in a screed under the floor. Most often, home owners choose pipes made of metal-plastic or cross-linked polyethylene. These products are reliable, flexible, and have good performance characteristics. The coolant mixing unit is a complex system that includes a pump, mixer, and manifold.
The advantages of water floors include the following properties:
- Profitability. This is the cheapest option for underfloor heating to operate.
- Versatility. The water floor can be laid under any finishing coating - under tiles, laminate, linoleum.
- Autonomy. The underfloor heating circuit works separately from the central heating. If necessary, it can be used autonomously, which is very convenient in the off-season.
- Relatively simple installation. Installing a water-heated floor in a bathroom is easy if you have the skills to handle tools.
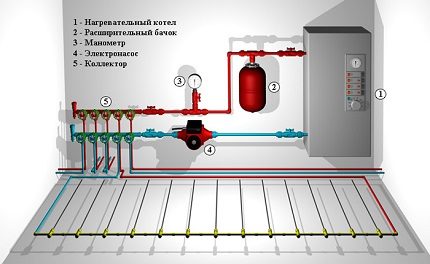
When connecting a water heated floor, a collector cabinet is installed. It is necessary for the convenience of placing the automation and connecting the pipeline to it.
To simplify installation, the water floor heating loops can be fixed with a stapler. How this is done in practice is shown in the video below:
Option # 2 - cable floor
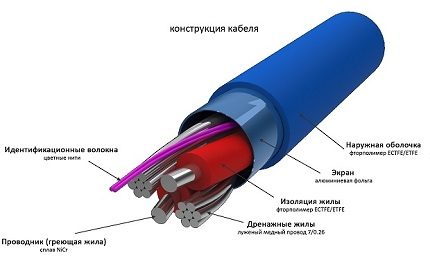
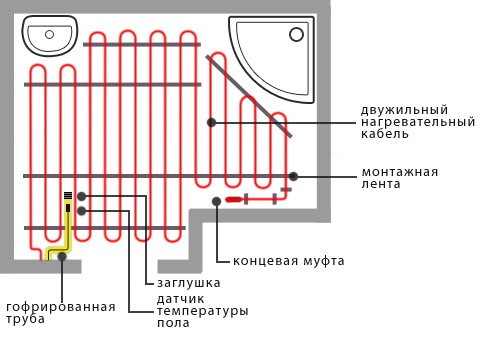
The design of the cable heating system consists of a thermostat, cable, temperature sensor. When choosing accessories, pay special attention to the cable. Such indicators are important: power, type (single or two-wire), form of release (coil, mats), reputation of the manufacturer.
The cable laid on the fiberglass mesh in the form of mats is easier to install. The thermomats can be cut and thus the system can be reconfigured. This is very convenient because structures can be used for heating rooms of any area. The only caveat: the integrity of the cable itself must not be violated.
For the operation of a warm floor, thermostats are needed that will control the degree of heating of the cable. It is best to choose programmable models. They are reliable, convenient, and with a two-tariff electricity payment system, they will also help significantly save money.
To make it easier for you to install a warm floor in a bathroom with your own hands, we suggest that you familiarize yourself with the recommendations of specialists:
Benefits of electric underfloor heating:
- Security. The systems are reliable. Even if water gets on the heating cable, nothing bad will happen.
- Versatility. The heating cable is laid in a screed, so the floor level rises slightly. This allows it to be used in rooms with any ceiling height.
- Durability. The service life of electrical systems exceeds the service life of water systems.
The specific heat emission of a heating cable for underfloor heating can be 17 W / m-21 W / m. These are optimal indicators, you should not look for more powerful products, because they can be unsafe to operate
Option # 3 - infrared film floors
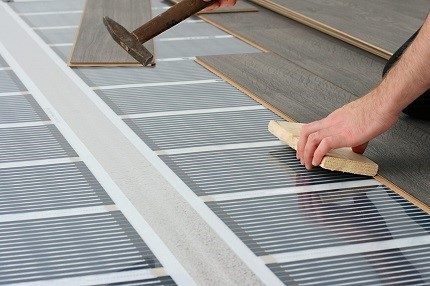
In recent years, infrared floor heating systems have gained particular popularity. Either rods or carbon based films are used as heaters. The power source is the mains, to which the heating element is connected through a thermostat.
Heating infrared film is versatile. It can be mounted under any type of coating. If you wish, you can even make your own mobile floor heater by attaching it to the carpet.
Infrared film is easy to install, but before starting work, you should thoroughly test the functionality of the heating elements. For laying tiles on top of the film, special adhesives are used.
Infrared film is absolutely safe, environmentally friendly, durable and reliable. One of the main advantages: if any part of the warm floor is damaged, the rest of the zones will work as before
Option # 4 - carbon rods
Carbon fiber core floor is called "smart" because of the increased environmental and fire safety, self-regulation system. The heating elements are connected to each other in the form of mats. The temperature is controlled by thermostats and sensors.
The main advantage of the carbon floor is that it does not overheat and is not afraid of pressure. Thanks to this unique property, it can be installed even under furniture and heavy objects.
Carbon mats are placed directly into the screed or tile adhesive. On top of the warm floor, you can mount any finishing coatings, including natural and artificial stone.
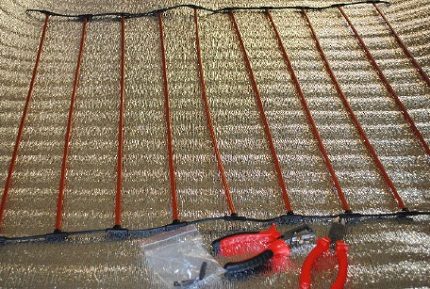
Carbon mats are durable. They are capable of serving up to 50 years. Since the rods are connected in parallel, the breakdown of one or more elements does not interfere with the operation of the other heaters.
Selection criteria for underfloor heating
There are several parameters that you should be guided by when choosing a floor heating system for a bathroom:
- Building type. For a private house or apartment with autonomous heating, you can choose a water structure. But for an apartment with centralized heating, an electrical system is more suitable - cable or infrared.
- Location of the premises. If an apartment in a multi-storey building is not located on the first floor, the risk of flooding of neighbors is too great, therefore it is extremely undesirable to install a water structure.
- Appointment. If underfloor heating is installed only in the bathroom, then it is easier to install heating mats than to lay the pipes of the water floor.
- Floor covering type. It is important to consider the limitations of heating systems and their compatibility with different types of finish coatings.
- Complexity of installation. If the owner of the premises plans to do the work with his own hands, it is better to dwell on the option that turns out to be the easiest to install.
- System cost. Before making the final choice, it is necessary to carefully calculate the quantity and cost of materials. This can be helped by special online calculators, which are available on some sites.
- Profitability. Heating should be inexpensive - this is an axiom. The advantages, disadvantages and operating costs of different types of systems should be compared.
When choosing between water and electrical systems, the condition of the electrical wiring should also be taken into account. If there is a risk that it will not cope with increased loads, it is better to choose a water floor.
We suggest listening to the opinion of a specialist to make it easier to decide on the design:
Electrical cable floor installation
Each system has its own installation features, and before starting work, you should familiarize yourself with the detailed installation instructions for a specific type of underfloor heating. It is also necessary to carefully read the technical documentation and manufacturer's recommendations.
Let's consider the specifics of installing a warm floor in a bathroom using the example of laying a heating cable.
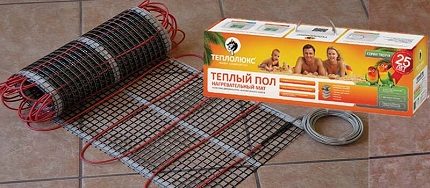
Warm floors from Devi, Thermo, Electrolux, Teplolux are especially popular on the market, but this does not mean that systems from other manufacturers are worse. You can always find a suitable option in terms of price-quality ratio
Step # 1: prepare the kit
To install a cable underfloor heating, you will need the following components:
- single or double core heating cable;
- thermostat;
- temperature sensor;
- plastic corrugated tube for laying the temperature sensor;
- mounting tape;
- thermal insulation material.
You can assemble a set for a warm floor yourself, or you can buy a ready-made one - with a cable, thermostat, sensor. In this case, only insulation will have to be purchased separately (foil-clad penofol, penoplex or other similar heat insulator will do).
The cost of a ready-made kit depends on the capacity of the system, the brand, the region in which the purchase is made. On average, 1 sq. underfloor heating costs 1,500 rubles, but it is better to check prices at the time of purchase
Step # 2: installing the thermostat
The element that should be installed first is the thermostat. When assembling the system, it will be connected to the temperature sensor. The devices work together: when the floor heats up to the desired temperature, the sensor sends a signal to the thermostat, and the thermostat turns off the heating until the temperature drops to a predetermined minimum, after which it turns on.
To mount the thermostat, it is necessary to make a recess in the wall at a height of 0.5-1 m according to the size of the box. Two grooves are cut from it to the floor, in which corrugated plastic tubes will be placed - with a temperature sensor wire and a power cable.

It is most convenient to install thermostats in the same rooms where heated floors are installed. However, there is steam and high humidity in the bathroom, so it is better to move the thermostat to an adjacent room in order to avoid malfunctions.
Step # 3: preparing the base
The floor is cleaned of debris, dedusted, leveled with a screed. It is necessary to achieve a smooth and even surface, remove drops, otherwise the risk of damage to the heating system during its operation increases.
When the main work on the preparation of the base is completed, you should wait until the mixture is completely dry. After that, the floor is carefully primed to strengthen the surface. The next stage of work begins when the primer is dry.
A layer of thermal insulation is placed on the prepared surface. It is needed to prevent heat loss. The cable heats the environment equally from all sides. Heat goes both up and down. This means that underfloor heating heats not only the bathroom, but also floor slabs, neighbors or the basement in general.
As a result, the owner of the apartment overpays for electricity, because the heating system works in an enhanced mode, and receives a minimum of heat. It is not difficult to solve this problem: it is enough to choose a good insulation with a thickness of at least 20 mm and lay it with the foil side up.
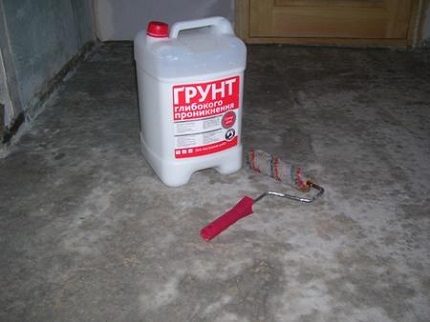
The primer is selected depending on the type of surface of the base. If it has a dense structure, it is enough to buy a standard mixture. And for a porous surface, it is better to choose a deep penetration primer and apply it in 2-3 layers
Step # 4: cable installation
The cable begins to be laid from the area where the wire will be connected to the thermostat. It is mounted on a special steel tape, which is attached to thermal insulation (step - 50 cm). The mounting tape has petal fasteners for easy fixing of the heating cable.
When laying the cable, you must ensure that the distance to the wall is at least 10 cm, and between the turns there is at least 6 cm (the step size can be up to 20 cm). The cable is laid as far as possible from radiators and pipes. Distance - from 20 cm.
Damage to the heating cable must not be allowed, so it is placed so that the bending radius of the loop is at least 5-6 wire diameters. Cable lines must not cross each other
Step # 5: installing the thermal sensor
A corrugated tube is required to mount the temperature sensor. The sensor is inserted into it, a plug is inserted so that building mixtures do not get into the tube cavity, and installed in the middle between the cable turns.
The terminals of the temperature sensor are connected to the thermostat by laying the wires in the prepared grooves. After that, the grooves in the wall can be carefully plastered or putty.
The system is ready for testing. It must be checked before pouring the screed to ensure that all elements are functional. The cable resistance can be checked with a tester. If everything is in order, proceed to the arrangement of the screed.
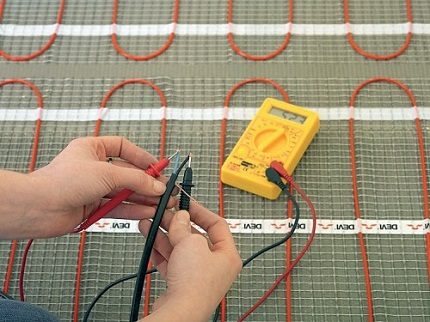
The parameters of the heating cable are checked at least twice. The first time it is done immediately after purchase, and the second - after installation. The indicators are compared with the characteristics in the technical documentation. Deviations are not allowed
Step # 6: pouring the screed
On top of the installed heating system, a special mixture for underfloor heating is poured in a layer of 3-10 cm. Until it is completely dry, you cannot walk on the floor, and the system itself is not turned on.
The setting time of the mixture should be indicated on the package, usually it is about three days. After this period, you can already walk on the floor, lay the topcoat, but about a month should pass before the first turn on of the floor heating. By this time, the screed will just gain the necessary strength.
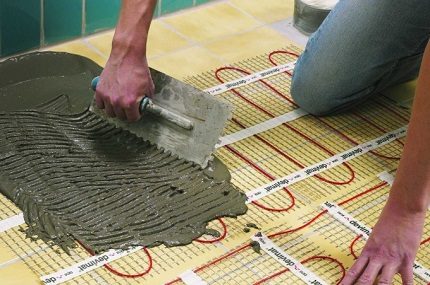
The screed mixture is applied with a notched trowel, starting from the far corner of the bathroom. It is important to ensure that all voids and gaps are filled with the mixture, and that the thickness of its layer above the cable must be at least 5 mm.
We offer a detailed video tutorial on the installation of a warm floor:
Most often, tiles or porcelain stoneware are used as flooring in the bathroom. This is due to the special operating conditions of the premises. However, thanks to underfloor heating systems, you can achieve an optimal microclimate in the bathroom, good floor heating, which means that other types of coatings are also suitable - stone, laminate, linoleum or carpet.