In order to equip a bathroom with high quality, one should not forget about the aesthetic side of finishing. If you think that after the renovation it is enough to install furniture, plumbing and that is where it all ends, then you are deeply mistaken. In some cases, the communications under the bathroom remain visible, which, of course, do not add aesthetics to the room. Therefore, the free space under the bathroom should be covered with something and a decorative screen is ideal for these purposes. Often, after repairs, there is practically no money left, and it is not possible to buy ready-made panels, or there are other reasons, so you can make a screen for a bath with your own hands.
Aesthetics above all
In Soviet times, the free space under the bathroom, as a rule, was not closed, and no one worried about the aesthetic side of the issue. But as time goes on, technologies develop and make it possible to make a screen for a bathtub of almost any shape and style. Nowadays, special attention is paid to the small details of the interior, because they can radically affect the overall picture of the renovation.
Bath screens can be purchased together with the bath or separately from it, but it is not always possible to select the desired size and shape of the structure. Therefore, you can create a homemade bath screen that will not differ from the factory one in either quality or appearance.
And in this article we will tell you how to make a screen for a bath with your own hands, what is required for this, what material to choose and other usefulness.
Choosing a material for the screen
At the very beginning, before making a screen for the bathroom with your own hands, you need to decide what material will be used.
The most popular today are:
- plastic;
- acrylic;
- brickwork;
- tile.
Product requirements
Just like a factory product, a homemade bath screen must meet certain requirements:
- After installing the screen, there should be free access to communications. That is, the structure must have a door, window or canvas made in the form of sliding sections;
- The material or its protective coating must correspond to the specific microclimate of the bathroom. In the bathroom, high humidity is almost constantly present, and there are sudden changes in temperature. Therefore, ordinary finishing materials for the bathroom cannot be used, because under the influence of these factors they will quickly collapse;
- After installing the screen, the bathtub should not lean on its plane.
Tip: The free space under the bathroom is often used as a niche for storing small items, household chemicals, detergents, etc. Additional shelves can also be installed on the inside and outside. This solution is especially important for small baths.
How to create a brick screen
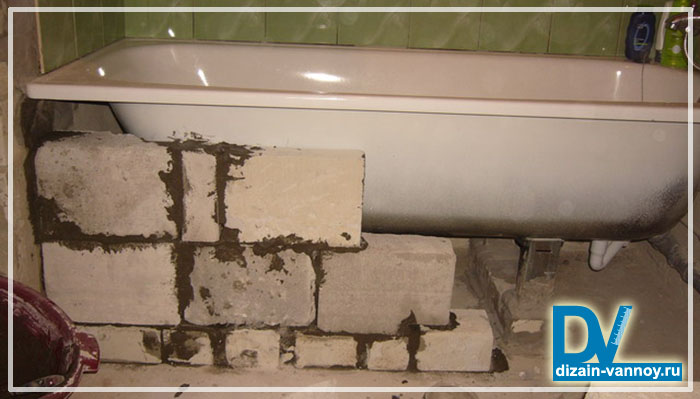
Brick is a fairly versatile material. In general, making a brick bath screen is a classic option.
It is quite simple to create a brick screen under the bathroom with your own hands, you just need to know and take into account the features of the workflow:
- Laying is carried out in a quarter of a brick;
- The screen is placed from one wall to another along the border of the bath;
- To create the correct and strong construction of the screen, each row of bricks is shifted by half of the previous one ("sewn together"), that is, a "checkerboard pattern" is obtained;
- The space between the floor and the bathroom is not completely laid; space is necessarily left for a door or a viewing window;
- The last row of bricks is not placed close to the bathtub. A gap of 1-2 cm is left for honey with bricks and a bathroom, it can be blown out with polyurethane foam or a decorative overlay can be installed.
When we make a screen for a brick bath, you need to remember that this is not a completely finished structure. After the mortar for masonry has completely dried, a decorative finish is mounted on top of the brick, it can be tile, laminate or mosaic.
Important! It is highly undesirable to use wallpaper, because the service lines will be very short-lived from high humidity and temperature.
Screen production from MDF
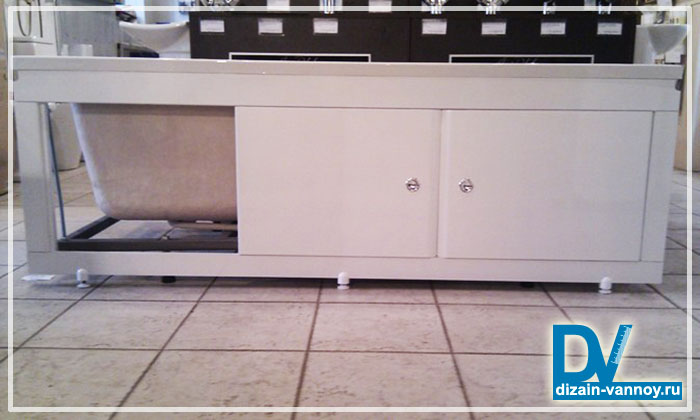
Screens made of MDF panels are quite popular, because with careful use and high-quality surface treatment, they can last a long time, which sometimes is 10 or more years.
Before making a screen for a bathroom made of MDF, a special frame made of a metal profile or wooden beams is installed.
Important! If wood is used for the frame, it must be pre-treated with a special antiseptic.
When the frame is completely ready, you can start sheathing with MDF panels. For high-quality protection of the material from moisture penetration, it is treated with a primer on all sides, and the places of contact with the floor are treated with silicone sealant.
The screen must have technical and ventilation openings approximately 2x5 cm in size. In order for such openings to look harmonious, decorative grilles or panels for ventilation ducts can be installed in them.
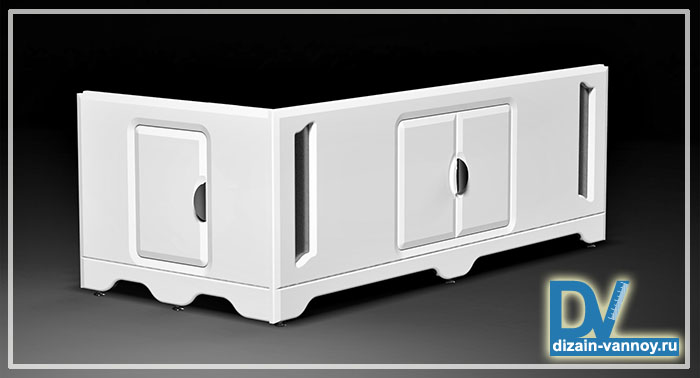
Manufacturing of plastic screens
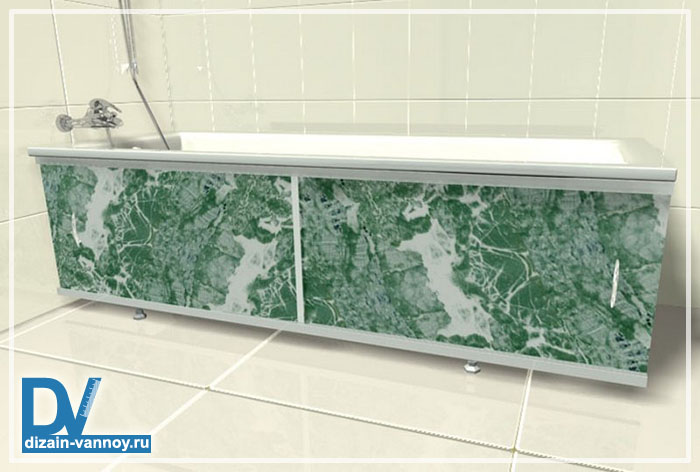
Manufacturing of screens for bathtubs from plastic panels is much easier than constructions from MDF. Since there is no pretreatment of the surface and decorative cladding, the installation time is reduced several times.
For your information: The undoubted advantages of plastic screens include easy installation and dismantling of the canvas.
Before installing the structure, you need to build a frame for this, you should apply a profile for the screen under the bath. Installing it is mandatory because it will fix the panel under the bath in the desired position. Thanks to this design, a sliding structure can be created. This solution will allow rational use of the space under the bathroom.
The frame is made of several parts. The starting profile is mounted first, which serves as a support for subsequent structures. The reliability of the installation will depend on whether the structure is skewed or not. Subsequent elements are mounted on special skids, along which the canvases will move.
Just like in MDF screens, plastic structures must have ventilation and technological openings.
Remember! When we make a bath screen with our own hands, you need to take care of sealing the area adjacent to the floor. This procedure can be done with a sealant. This will prevent water from entering the space under the bathtub.
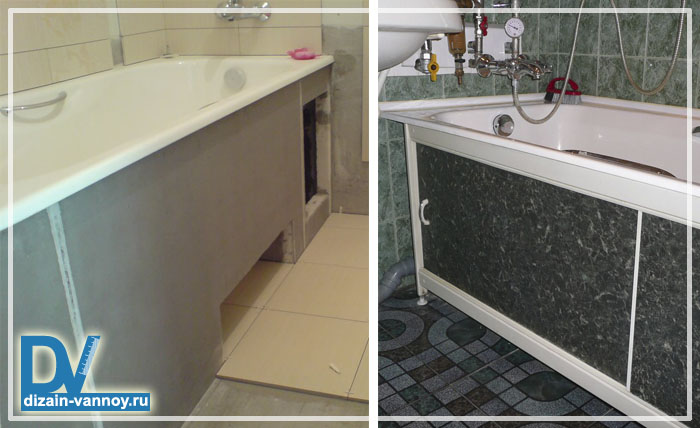
Decorative tile panel
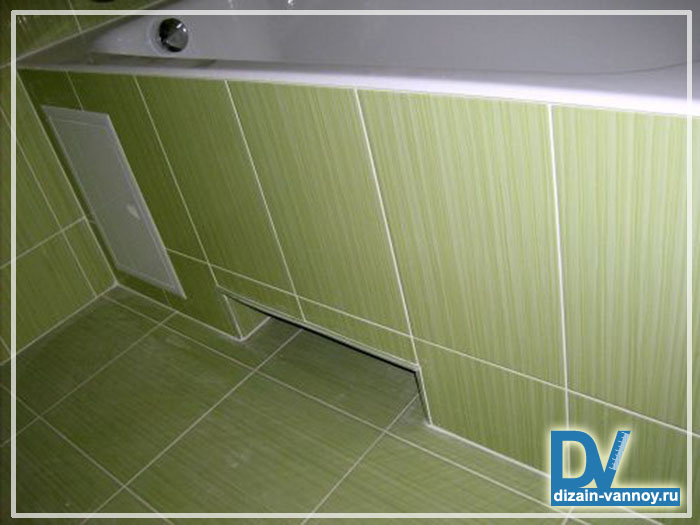
The process of creating a screen from tiles is very similar to the previous ones, only here a pre-prepared frame is sheathed with moisture-resistant plasterboard, after which ceramic tiles are laid.
Unlike previous designs, the do-it-yourself tiled screen in the bathroom is made monolithic. Therefore, before starting the installation, you need to think over the entire design of the screen, where the communication will take place, ventilation and technical openings will be located, Tat as access to the pipes will be limited, at the very beginning you will have to take care of creating a window or door for servicing communications.
Before making a ceramic tile bathroom screen, you need to decide on the base material. The best would be brickwork or drywall construction. The frame for drywall can be made of wooden bars or a metal profile.
The laying of ceramic tiles is carried out with waterproof tile adhesive for kitchens and bathrooms, while the joints are cultivated with a special grout.
Important! The grout should contain substances that prevent the formation of mildew and mildew.
A few words in conclusion
To make the screen for the bathroom with your own hands of high quality and create a cozy atmosphere in the room, use our tips on how to make a screen for the bathroom, and you can also study video tutorials and photo reports of the masters.